Checklist Items
Overview
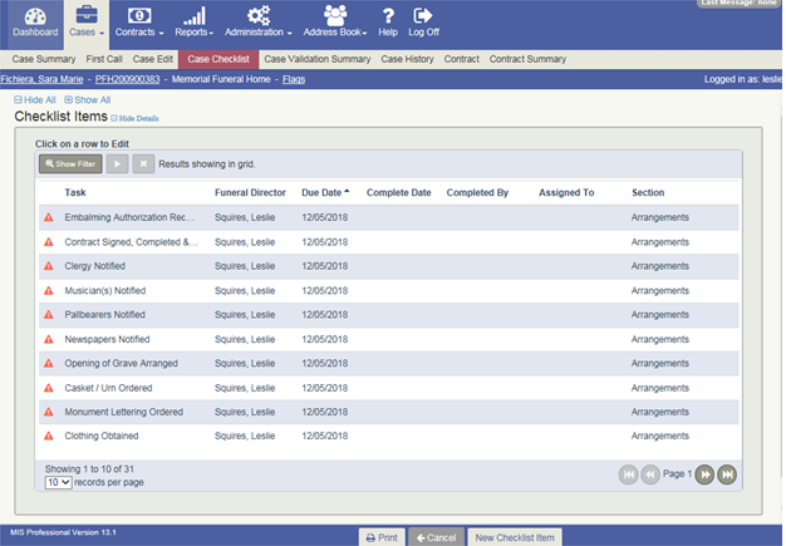
The Checklist Items screen shows all checklist items for the selected case. The screen shows all items, complete and incomplete. The checklist screen can be accessed by navigating to Cases - Case Check List Items in the menu bar, as well as, by selecting a case on the Case Search widget and clicking the "Case Checklist" quick nav link.
WorkFlow
Checklist items can be added to a case from two areas in the MIS Professional application:
- Case Edit screen
- Checklist Items screen
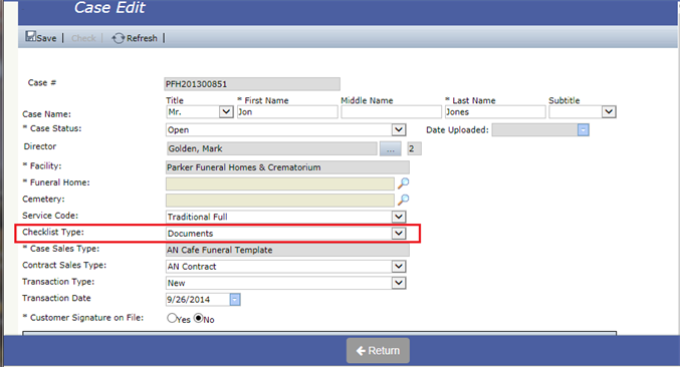
Case Edit
Checklist items appear automatically on a case if a checklist is defined on the Case Edit screen in the Checklist Type field.
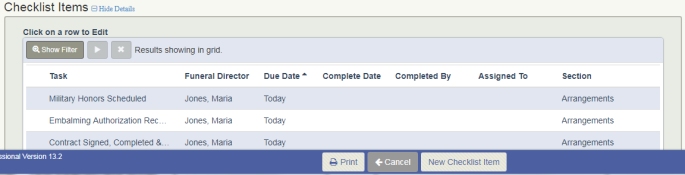
Checklist Items
Adding a Checklist Item:
- Clicking the New Checklist Item button at the bottom of the Checklist Items screen, allows the user to manually add checklist items
- All manually added checklist items are created with a Section of "Other" and default to the Funeral Director for the case.
- These fields cannot be changed.
- Fill in the Checklist Item and Due Date fields and click Save to add a checklist item
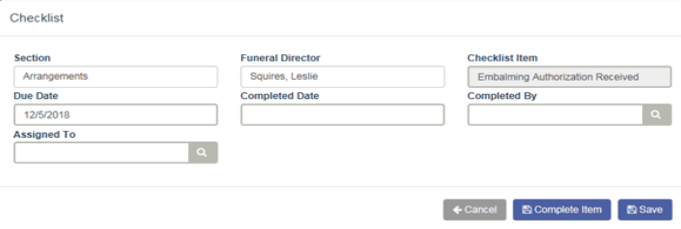
Editing a Checklist Item:
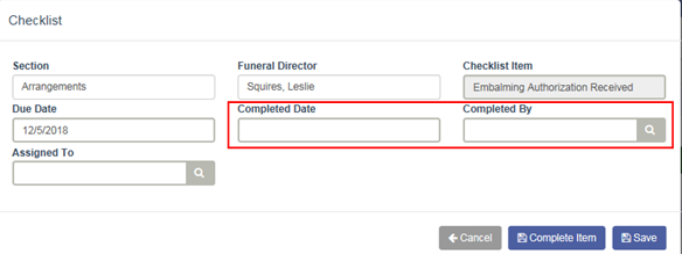
- When you are on the Checklist Items screen for a specific case and you select an item, the Checklist Item window opens for that item.
- When editing a checklist item, the "Completed Date" and "Completed By" fields will not be automatically populated
- The user can select an "Assigned To" name and click the "Complete Item" button, which will auto populate the "Completed Date", as well as, the "Completed By" fields. This provides for a quick way to assign the ‘Completed By’ and ‘Completed Date’ fields
- When the "Complete Item" is clicked:
The "Completed By" field will be populated with the name of the logged in employee / user.
- If the user is not an employee then a message will appear: "Please Select Completed By".
- The ‘Completed Date’ will be populated with the current date.
- Users that are not setup as an employee can manually select a Completed Date and the Completed By
NOTES
- You can only delete manually entered checklist items. Items that were automatically added due to a checklist configured on the case on Case Edit, can not be deleted.
- Case Checklist Items can also be viewed on the Case Summary screen on the Checklist widget
- This widget shows all checklist items for the selected case.
Alert Icons
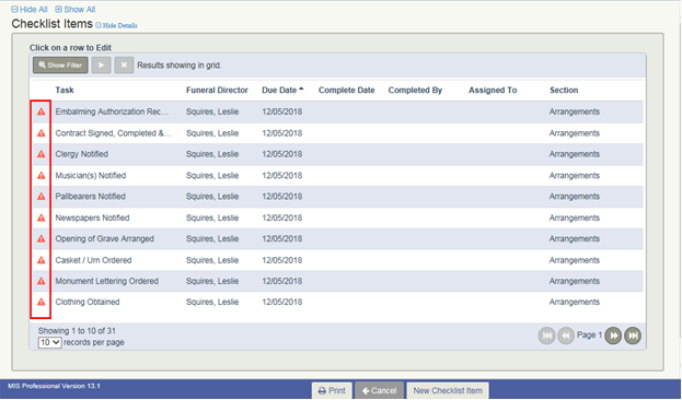
Overdue items show with an orange or yellow alert icon depending on the days overdue
- 2 or more days overdue = Orange

- 1 day overdue = Yellow

Sort Order
The list of items is sorted by the due date. The oldest items are shown at the top as these are the highest priority
Defaulting a checklist by Sales Need
A checklist can be setup to be automatically added to a case based on the Sales Need.
A trainer or a support representative can assist in setting up this feature for you.
Printing
1. Select a Case on the Dashboard screen
2. Navigate to Cases – Case Checklist
3. Click the ‘Print’ Button
4. The Case Checklist report will generate for the specific case
NOTE: If there are no case checklist items, the report will print blank.